Data Storage REST API
You can access the Data Storage service from any device that can send HTTP requests. There are many things you can do with our REST API. For example:
- You can manipulate data on the cloud with any programming language.
- If you want to migrate from TDS to other services, you can export all your data.
- Your mobile site can fetch data from the cloud with vanilla JavaScript if you regard importing the JavaScript SDK as an overkill.
- You can import new data in batches to be consumed by your app later.
- You can export recent data for offline analysis or additional incremental backup.
API Version
The current API version is 1.1.
Testing
To help you easily test out our REST API, this page provides curl command examples. Those examples are targeted for users of unix-like platforms (including macOS and Linux), so you may need to modify the commands if you are using cmd.exe on Windows.
For example, \ in curl examples means to be continued on the next line, but cmd.exe will consider it as a path separator.
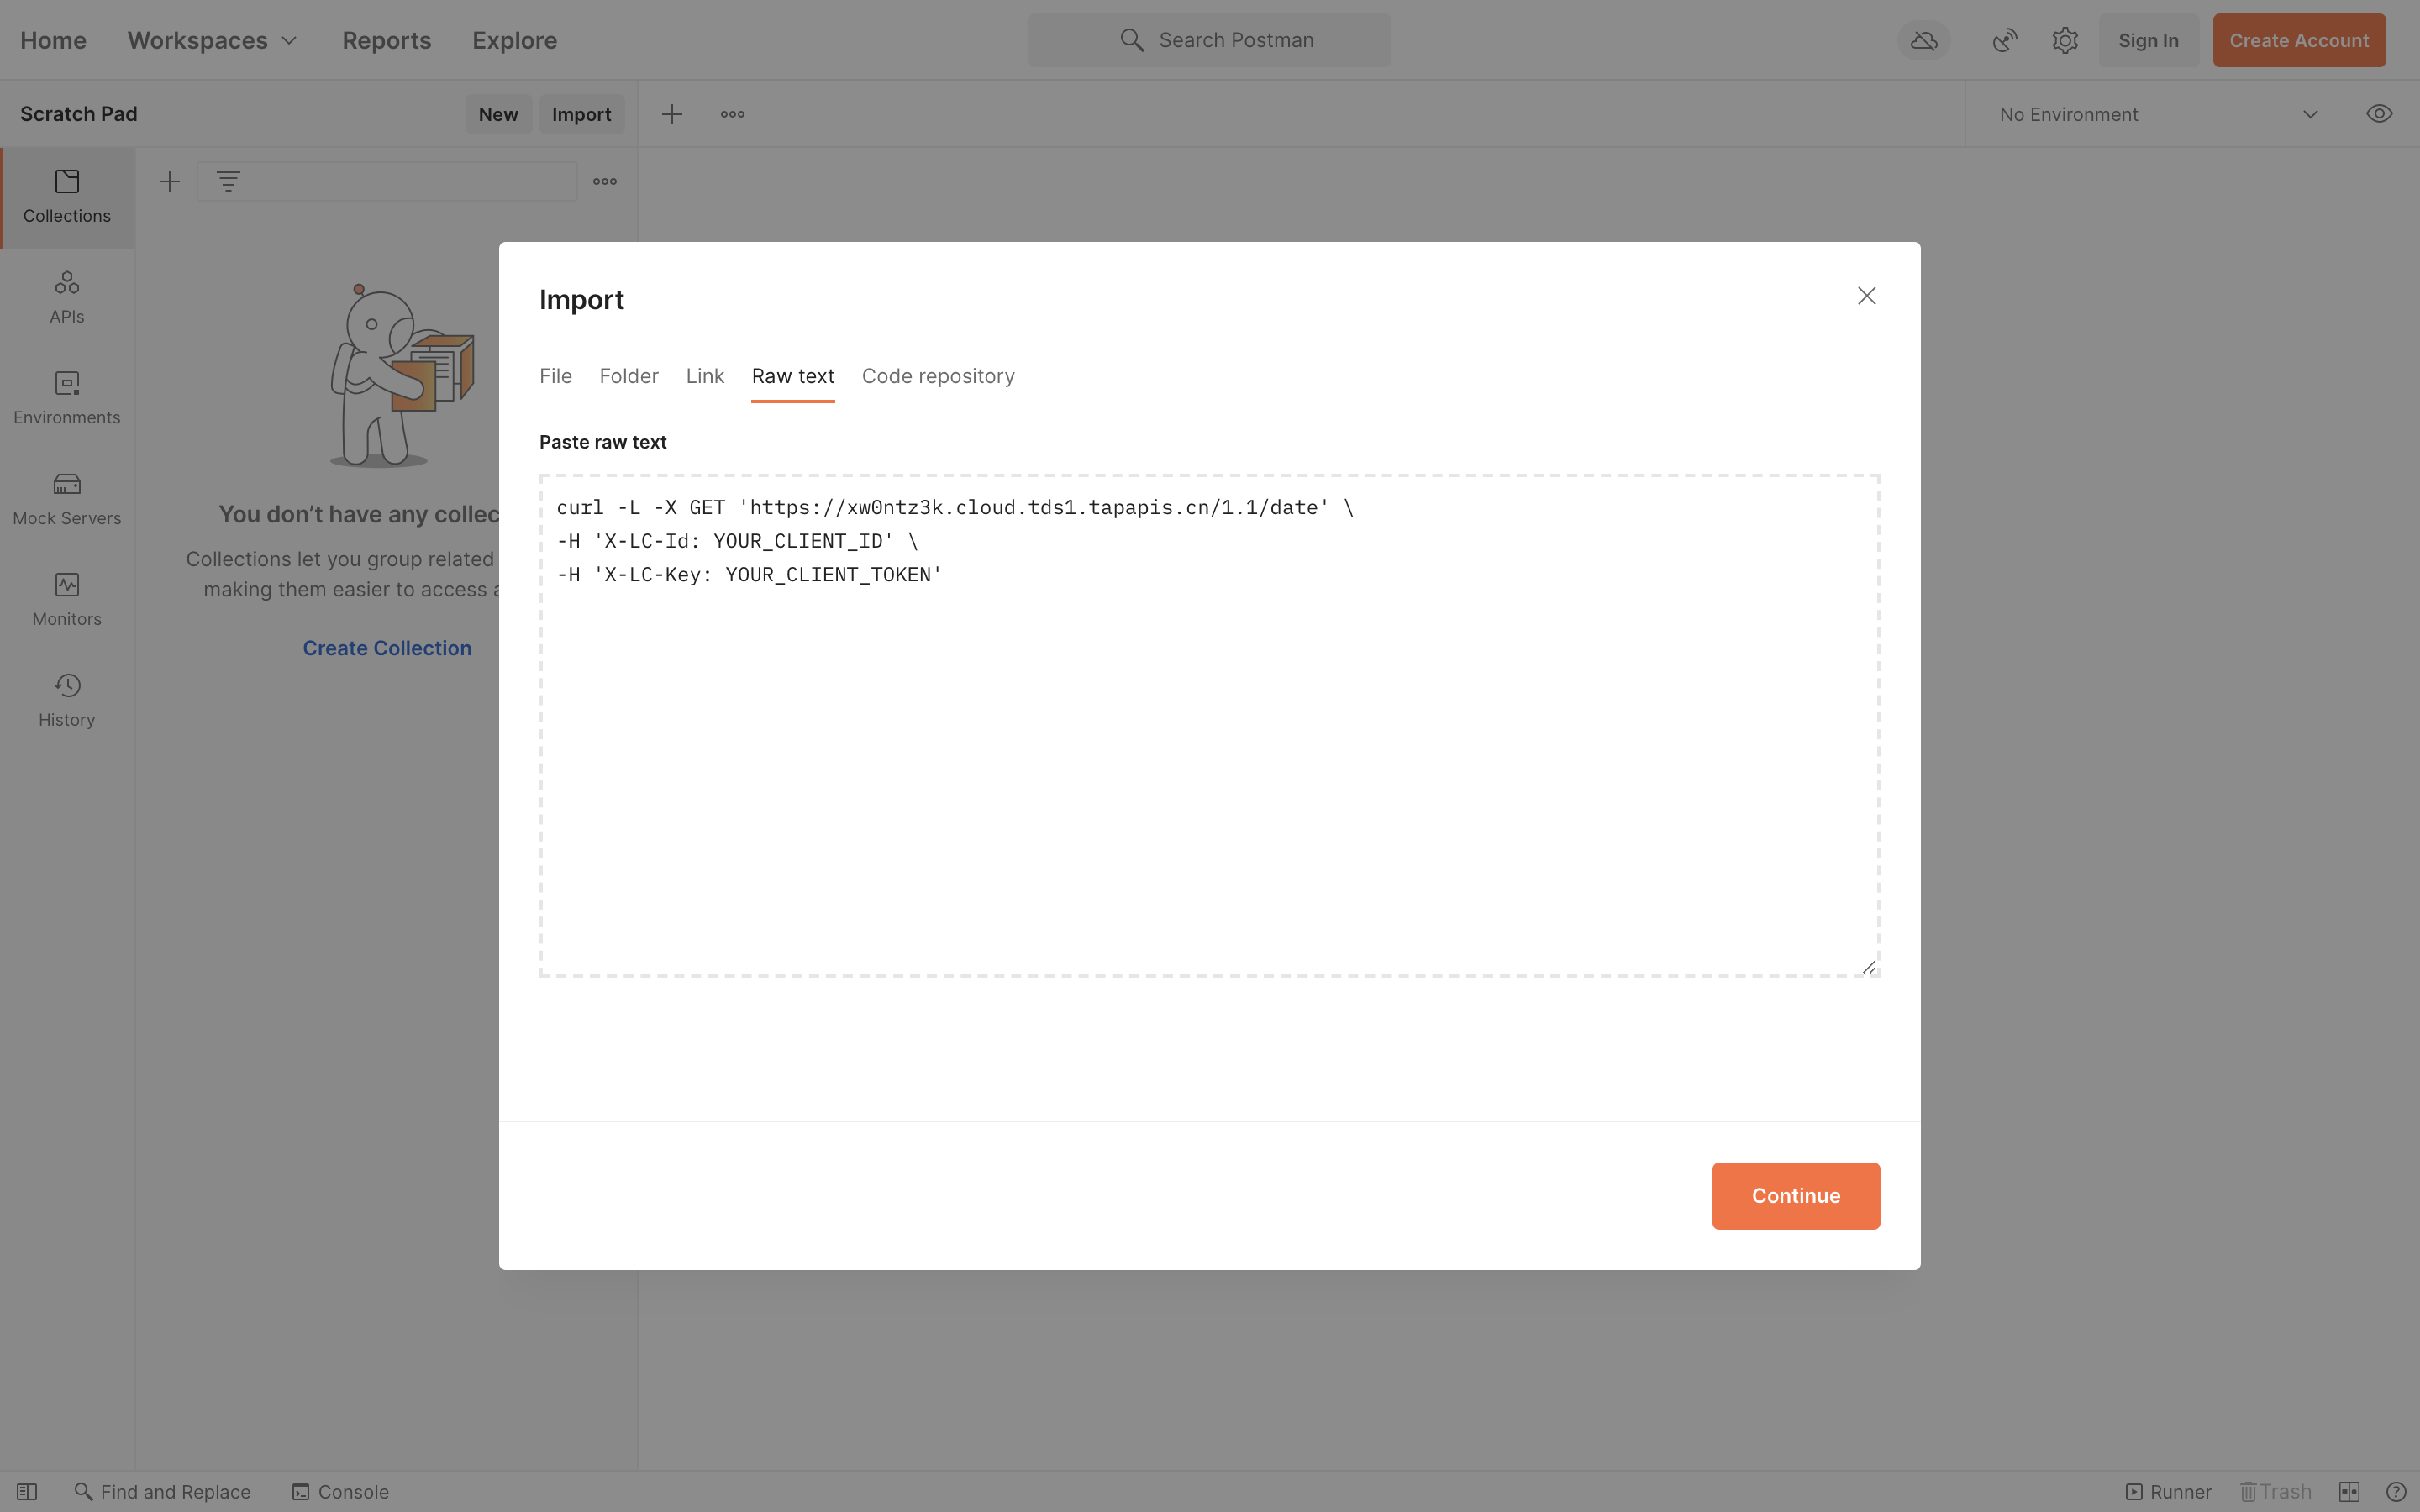
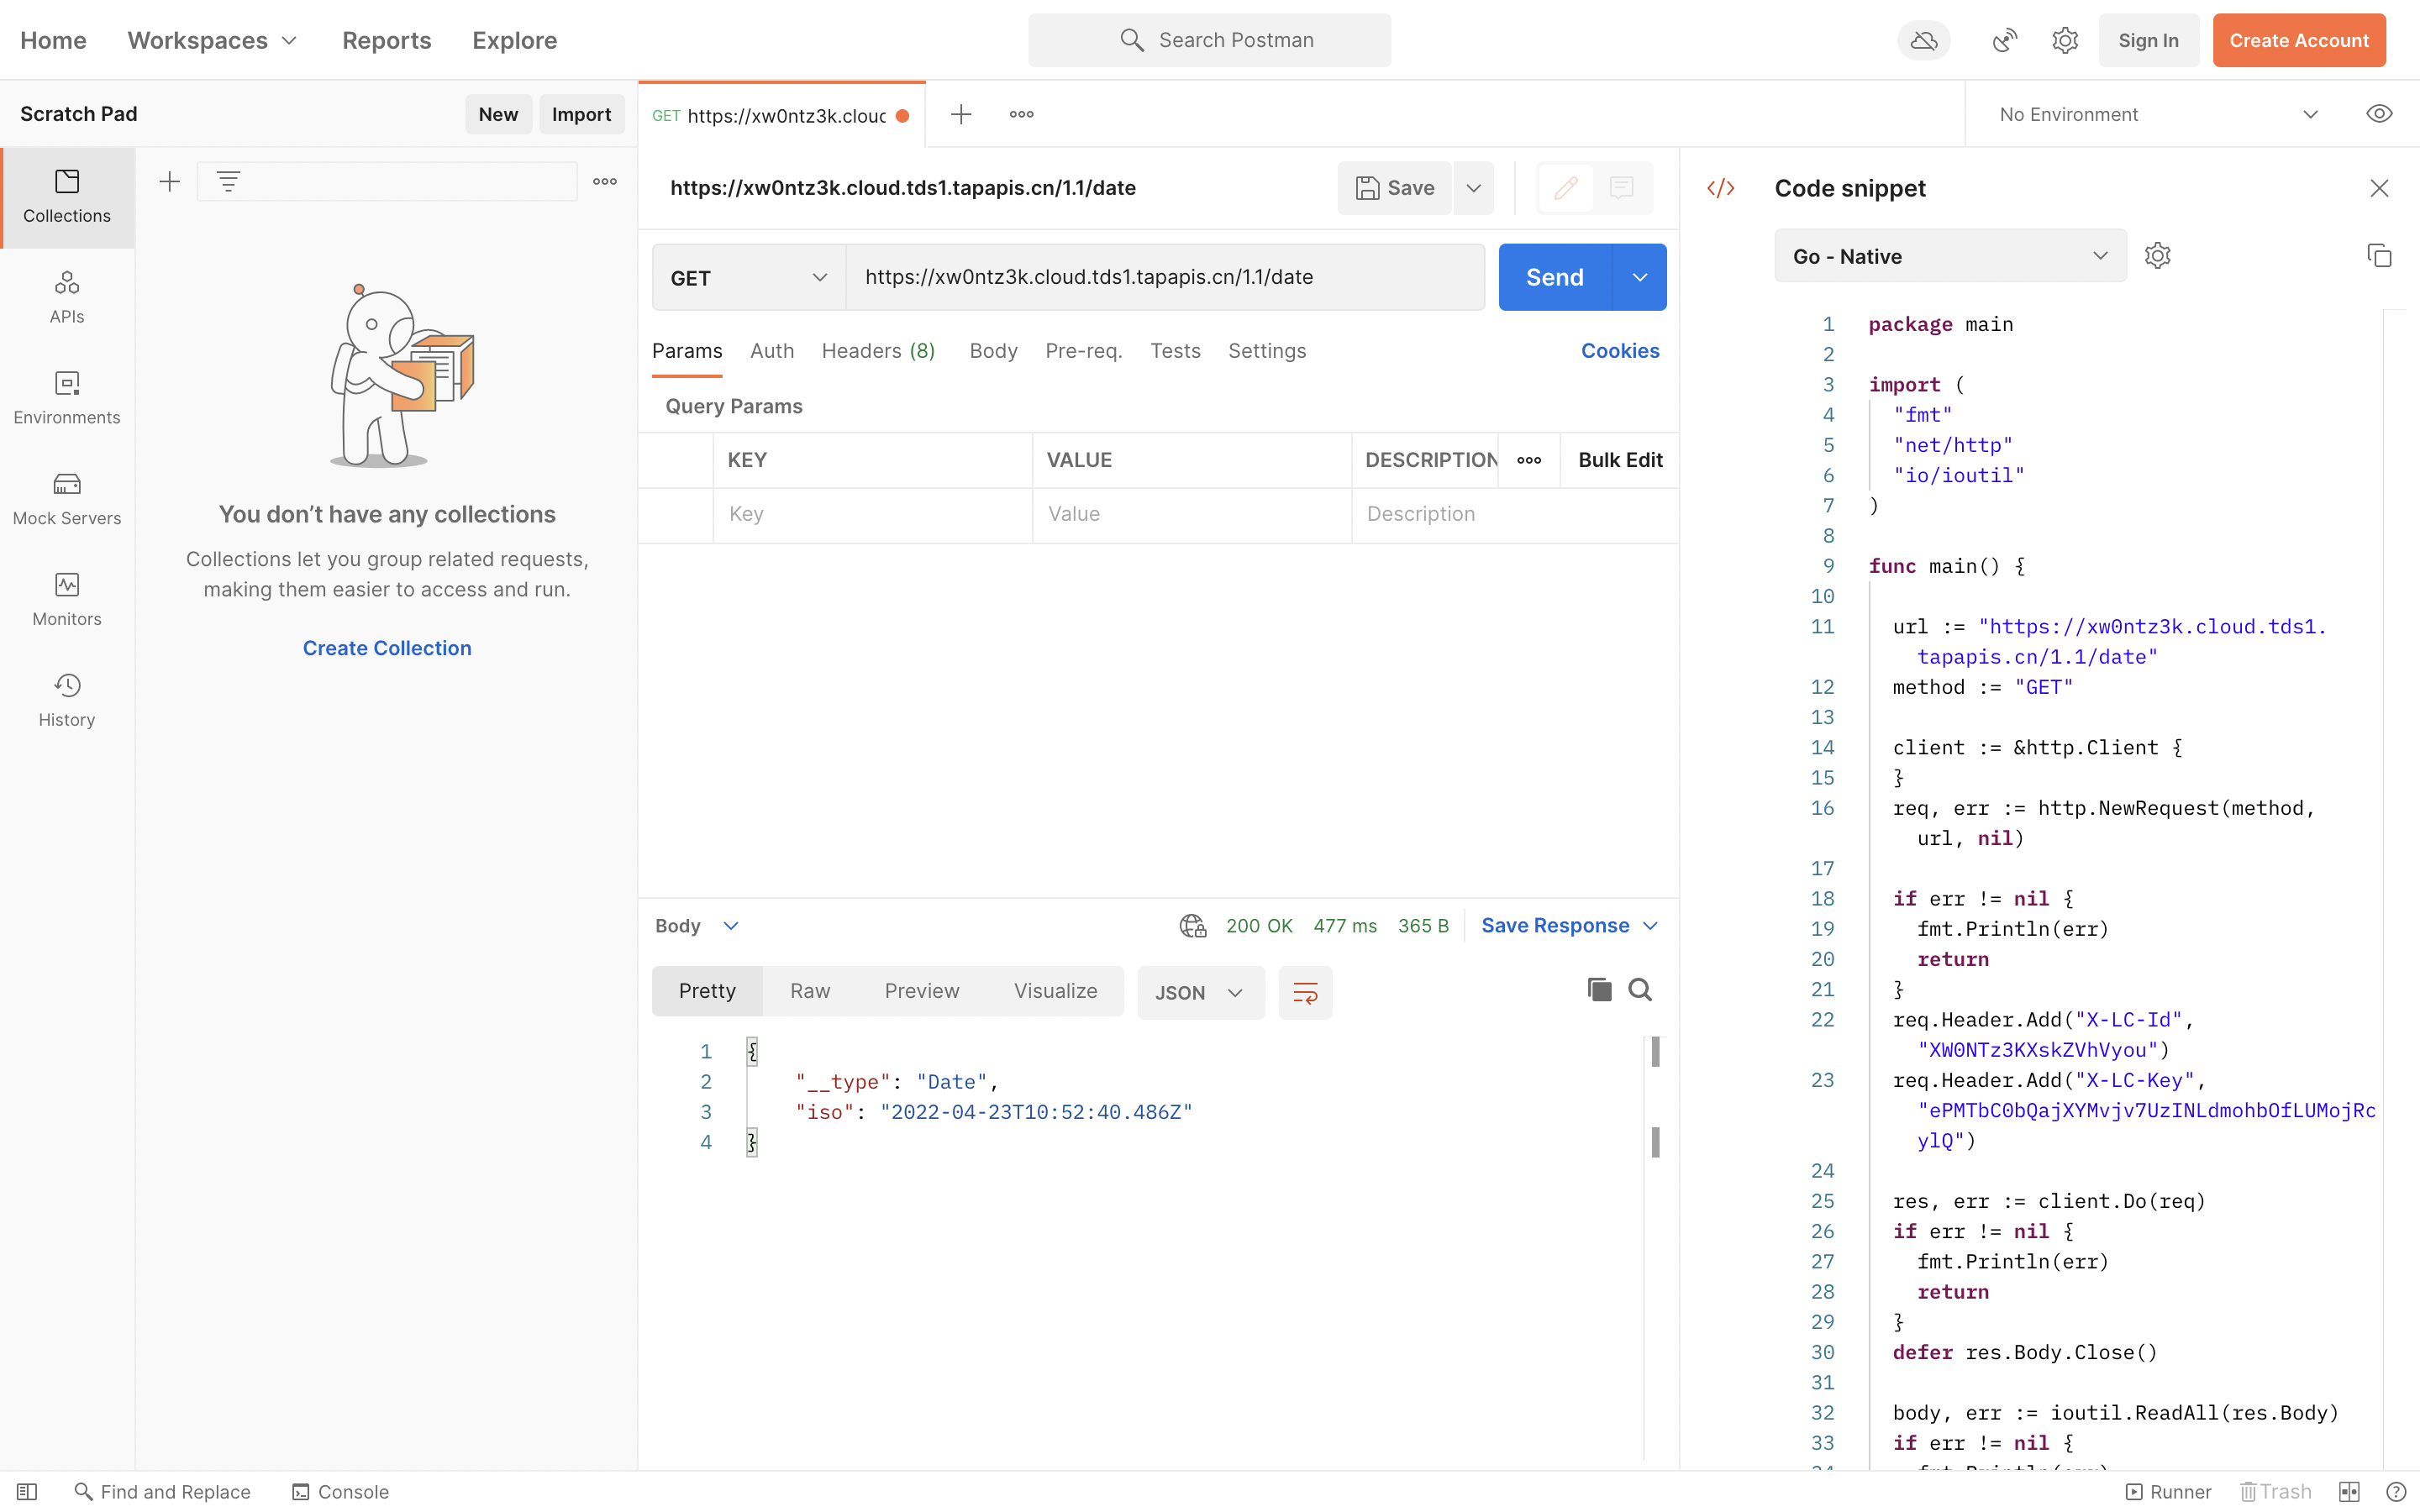
To make things easier, we recommend you to use Postman for testing on Windows.
You can directly import the curl commands shown on this page into Postman.
With Postman, you can also generate code for the languages and libraries of your choice for accessing our REST API.
Base URL
The Base URL for the REST API (represented with {{host}} in curl examples) is the API domain of your app. You can manage and view it on the dashboard.
Objects
| URL | HTTP Method | Functionality |
|---|---|---|
| /1.1/classes/<className> | POST | Create an object |
| /1.1/classes/<className>/<objectId> | GET | Retrieve an object |
| /1.1/classes/<className>/<objectId> | PUT | Update an object |
| /1.1/classes/<className> | GET | Query objects |
| /1.1/classes/<className>/<objectId> | DELETE | Delete an object |
| /1.1/scan/classes/<className> | GET | Iterate over objects |
Users
| URL | HTTP Method | Functionality |
|---|---|---|
| /1.1/users | POST | Register Connect user |
| /1.1/usersByMobilePhone | POST | Register or log in via mobile phone |
| /1.1/login | POST | Log in |
| /1.1/users/<objectId> | GET | Retrieve a user |
| /1.1/users/me | GET | Retrieve a user with session token |
| /1.1/users/<objectId>/refreshSessionToken | PUT | Reset session token |
| /1.1/users/<objectId>/updatePassword | PUT | Reset password with old password |
| /1.1/users/<objectId> | PUT | Update user info Connect user Verify email |
| /1.1/users | GET | Query users |
| /1.1/users/<objectId> | DELETE | Delete a user |
| /1.1/requestPasswordReset | POST | Request to reset password with email |
| /1.1/requestEmailVerify | POST | Request to verify email |
Roles
| URL | HTTP Method | Functionality |
|---|---|---|
| /1.1/roles | POST | Create a role |
| /1.1/roles/<objectId> | GET | Retrieve a role |
| /1.1/roles/<objectId> | PUT | Update a role |
| /1.1/roles | GET | Query roles |
| /1.1/roles/<objectId> | DELETE | Delete a role |
Data Schema
| URL | HTTP Method | Functionality |
|---|---|---|
| /1.1/schemas | GET | Retrieve schemas of all classes |
| /1.1/schemas/<className> | GET | Retrieve the schema of a class |
Others
| URL | HTTP Method | Functionality |
|---|---|---|
| /1.1/date | GET | Retrieve server date and time |
| /1.1/exportData | POST | Request to export all data from the app |
| /1.1/exportData/<id> | GET | Retrieve the status and result of a data export job |
Request Format
For POST and PUT requests, the request body must be in JSON, and the Content-Type HTTP header should be application/json accordingly.
The X-LC-Id and X-LC-Key headers are used for authentication:
curl -X PUT \
  -H "X-LC-Id: {{appid}}" \
  -H "X-LC-Key: {{appkey}}" \
  -H "Content-Type: application/json" \
  -d '{"content": "The content of this blog post"}' \
  https://{{host}}/1.1/classes/Post/<objectId>
X-LC-Id is the App ID and X-LC-Key is the App Key or Master Key.
A ,master postfix is used to indicate that the value of X-LC-Key is a Master Key. For example:
X-LC-Key: {{masterkey}},master
Cross-origin resource sharing is supported so that you can use these headers with XMLHttpRequest in JavaScript.
You can also use the Accept-Encoding header to enable compression with gzip or brotli.
X-LC-Sign
You may also authenticate requests with X-LC-Sign instead of X-LC-Key to minimize the risk of leaking the App Key:
curl -X PUT \
  -H "X-LC-Id: {{appid}}" \
  -H "X-LC-Sign: d5bcbb897e19b2f6633c716dfdfaf9be,1453014943466" \
  -H "Content-Type: application/json" \
  -d '{"content": "Updating a post with the X-LC-Sign header"}' \
  https://{{host}}/1.1/classes/Post/<objectId>
The value of X-LC-Sign is a string in the form of sign,timestamp[,master]:
| Name | Optionality | Description |
|---|---|---|
| sign | Required | Concat timestamp and App Key (or Master Key), then calculate its MD5 hash value. |
| timestamp | Required | The unix timestamp of the current request, accurate to milliseconds. |
| master | Optional | Use this postfix to indicate that the Master Key is used. |
Please make sure the letters in the MD5 hash value in the sign portion are in lowercase.
For example, given the following application:
| App Id | FFnN2hso42Wego3pWq4X5qlu |
| App Key | UtOCzqb67d3sN12Kts4URwy8 |
| Master Key | DyJegPlemooo4X1tg94gQkw1 |
| Request time | 2016-01-17 15:15:43.466 GMT+08:00 |
| timestamp | 1453014943466 |
To calculate the sign with App Key:
md5( timestamp + App Key )
= md5(1453014943466UtOCzqb67d3sN12Kts4URwy8)
= d5bcbb897e19b2f6633c716dfdfaf9be
-H "X-LC-Sign: d5bcbb897e19b2f6633c716dfdfaf9be,1453014943466" \
To calculate the sign with Master Key:
md5( timestamp + Master Key )
= md5(1453014943466DyJegPlemooo4X1tg94gQkw1)
= e074720658078c898aa0d4b1b82bdf4b
-H "X-LC-Sign: e074720658078c898aa0d4b1b82bdf4b,1453014943466,master" \
Here ,master is added to the end of the string to tell the server that the signature is generated with the Master Key.
Using master key will bypass all permission validations. Make sure you do not leak the master key and only use it in restrained environments.
Specifying Hook Invocation Environment
For requests that may trigger hooks on Cloud Engine, use the X-LC-Prod HTTP header to specify the invocation environment:
X-LC-Prod: 0means to use the staging environmentX-LC-Prod: 1means to use the production environment
If you do not specify the X-LC-Prod HTTP header, the hook in the production environment will be invoked.
Response Format
For all the requests made to the REST API, The response body is always a JSON object.
An HTTP status code is used to indicate whether a request succeeded or failed.
A 2xx status code indicates success, and a 4xx/5xx status code indicates the occurrence of an error.
When an error occurs, the response body will be a JSON object with two fields, code and error,
where code is the error code (integer) and error is a brief error message (string).
The code may be identical to the HTTP status code,
but oftentimes it is a customized error code more specific than the HTTP status code.
For example, if you try to save an object with an invalid key name, you will see:
{
  "code": 105,
  "error": "Invalid key name. Keys are case-sensitive and 'a-zA-Z0-9_' are the only valid characters. The column is: 'invalid?'."
}
Objects
Object Format
The Data Storage service is built around objects. Each object consists of several key-value pairs, where values are in JSON-compatible formats. Objects are schemaless, so you do not need to allocate keys in advance. You only need to set key-value pairs as you wish and when needed.
For example, if you are implementing a Twitter-like social app, you may give the following attributes (key-value pairs) to a post:
{
  "content": "Discover Superb Games.",
  "pubUser": "TapTap",
  "pubTimestamp": 1435541999
}
Keys can only contain letters, numbers, and underscores. Values can be anything encoded in JSON.
Each object belongs to a class (table in traditional database terms).
We recommend using CapitalizedWords to name your classes, and mixedCases to name your attributes.
This naming style helps to improve the readability of your code.
Each time when an object is saved to the cloud, a unique objectId will be assigned to it.
createdAt and updatedAt will also be filled in by the cloud, which indicate the time the object is created and updated.
These attributes are reserved and you cannot modify them yourself.
For example, the object above could look like this when retrieved:
{
  "content": "Discover Superb Games.",
  "pubUser": "TapTap",
  "pubTimestamp": 1435541999,
  "createdAt": "2015-06-29T01:39:35.931Z",
  "updatedAt": "2015-06-29T01:39:35.931Z",
  "objectId": "558e20cbe4b060308e3eb36c"
}
createdAt and updatedAt are strings whose content is a UTC timestamp in ISO 8601 format with millisecond precision: YYYY-MM-DDTHH:MM:SS.MMMZ.
objectId is a string unique in the class, like the primary key of a relational database.
In our REST API, class-level operations use the class name as its endpoint.
For example, the URL for operations on a class named Post will be:
https://{{host}}/1.1/classes/Post
There is also a special URL for users:
https://{{host}}/1.1/users
Object-specific operations use nested URLs under the class.
For example, the URL for operations on an object in the Post class with 558e20cbe4b060308e3eb36c as its objectId will be:
https://{{host}}/1.1/classes/Post/558e20cbe4b060308e3eb36c
Creating Objects
To create a new object, send a POST request containing the object itself to the URL for the class. For example, to create the object we mentioned earlier:
curl -X POST \
  -H "X-LC-Id: {{appid}}" \
  -H "X-LC-Key: {{appkey}}" \
  -H "Content-Type: application/json" \
  -d '{"content": "Discover Superb Games.","pubUser": "TapTap","pubTimestamp": 1435541999}' \
  https://{{host}}/1.1/classes/Post
If succeeded, you will receive 201 Created with a Location header point to the URL of the object just created:
Status: 201 Created
Location: https://{{host}}/1.1/classes/Post/558e20cbe4b060308e3eb36c
And the response body is a JSON object with objectId and createdAt key-value pairs:
{
  "createdAt": "2015-06-29T01:39:35.931Z",
  "objectId": "558e20cbe4b060308e3eb36c"
}
To tell the cloud to return the full data of the new object, set the fetchWhenSave parameter to true:
curl -X POST \
  -H "X-LC-Id: {{appid}}" \
  -H "X-LC-Key: {{appkey}}" \
  -H "Content-Type: application/json" \
  -d '{"content": "Discover Superb Games.","pubUser": "TapTap","pubTimestamp": 1435541999}' \
  https://{{host}}/1.1/classes/Post?fetchWhenSave=true
Class names can only contain letters, numbers, and underscores. Every application can contain up to 500 classes, and each class can contain up to 300 fields. There is no limit on the number of objects in each class.
Retrieving Objects
After you create an object, you can send a GET request to the Location of the response to fetch the object. For example, to fetch the object we just created:
curl -X GET \
  -H "X-LC-Id: {{appid}}" \
  -H "X-LC-Key: {{appkey}}" \
  https://{{host}}/1.1/classes/Post/558e20cbe4b060308e3eb36c
The response body is a JSON object containing all the attributes you gave to the object, as well as the three preserved attributes (objectId, createdAt, and updatedAt):
{
  "content": "Discover Superb Games.",
  "pubUser": "TapTap",
  "pubTimestamp": 1435541999,
  "createdAt": "2015-06-29T01:39:35.931Z",
  "updatedAt": "2015-06-29T01:39:35.931Z",
  "objectId": "558e20cbe4b060308e3eb36c"
}
If the object contains pointers to other objects, you can add an include parameter to indicate that you wish to retrieve these objects as well. For example, if a post has an author field indicating the person who posted it, you can retrieve the post together with its author in this way:
curl -X GET \
  -H "X-LC-Id: {{appid}}" \
  -H "X-LC-Key: {{appkey}}" \
  -G \
  --data-urlencode 'include=author' \
  https://{{host}}/1.1/classes/Post/<objectId>
You can use a dot (.) in the value of the include parameter to further include the object pointed by a pointed object. For example, assuming that there is a department field for each author, you can use include=author.department to retrieve the information of the department.
If the class does not exist, you will receive a 404 Not Found error:
{
  "code": 101,
  "error": "Class or object doesn't exists."
}
If the server cannot find the object according to the objectId you specified, you will receive an empty object (with HTTP status code being 200 OK):
{}
One exception is that for the built-in classes (those with a name starting with a leading underscore), you may get a different result when trying to retrieve an object with an invalid objectId.
For example, when retrieving a _User object with an objectId that does not exist, you will get a 400 Bad Request error.
curl -X GET \
  -H "X-LC-Id: {{appid}}" \
  -H "X-LC-Key: {{appkey}}" \
  https://{{host}}/1.1/classes/_User/<NonexistObjectId>
The request above will lead to the following response:
{
  "code": 211,
  "error": "Could not find user."
}
We recommend using GET /users/<objectId> to fetch user information instead of directly querying the _User class.
See also Retrieving Users.
Updating Objects
To update an object, you can send a PUT request to the object URL.
The server will only update the attributes you explicitly specified in the request (except for updatedAt).
For example, to only update the content of a post:
curl -X PUT \
  -H "X-LC-Id: {{appid}}" \
  -H "X-LC-Key: {{appkey}}" \
  -H "Content-Type: application/json" \
  -d '{"content": "Discover Superb Games. https://www.taptap.io/"}' \
  https://{{host}}/1.1/classes/Post/<objectId>
If the update succeeds, a JSON object containing an updatedAt property will be returned:
{
  "updatedAt": "2015-06-30T18:02:52.248Z"
}
The fetchWhenSave parameter can also be used when updating an object.
Keep in mind that you will only get the updated fields instead of all the fields of the object.
Counter
For an existing post in our app, we may want to keep track of how many people liked it. However, since a lot of likes could happen at the same time, if we have the client retrieve the value of the number of likes, update it, and store the new value back to the cloud, there will likely be conflicts that cause the number stored on the cloud to be inaccurate.
To solve the problem, you can use the Increment atomic operator to increase a counter-like attribute:
curl -X PUT \
  -H "X-LC-Id: {{appid}}" \
  -H "X-LC-Key: {{appkey}}" \
  -H "Content-Type: application/json" \
  -d '{"upvotes":{"__op":"Increment","amount":1}}' \
  https://{{host}}/1.1/classes/Post/<objectId>
The command above adds 1 to the upvotes property of the object. You can specify how much you want to increment with the amount parameter. The number can be negative to indicate a subtraction from the original value.
There is also a Decrement operator.
Decrementing a positive number is equivalent to Incrementing a negative number.
Bitwise Operators
There are three bitwise operators for integers:
BitAnd: Bitwise ANDBitOr: Bitwise ORBitXor: Bitwise XOR
curl -X PUT \
  -H "X-LC-Id: {{appid}}" \
  -H "X-LC-Key: {{appkey}}" \
  -H "Content-Type: application/json" \
  -d '{"flags":{"__op":"BitOr","value": 0x0000000000000004}}' \
  https://{{host}}/1.1/classes/Post/<objectId>
Arrays
There are three atomic operators for arrays:
Addextends an array attribute by appending elements to the given array.AddUniqueis similar toAdd, but only appends elements not already contained in the array attribute.Removeremoves all occurrences of elements specified in the given array.
The given array mentioned above is passed in as the value of the objects key.
For example, to add some tags to the post:
curl -X PUT \
  -H "X-LC-Id: {{appid}}" \
  -H "X-LC-Key: {{appkey}}" \
  -H "Content-Type: application/json" \
  -d '{"tags":{"__op":"AddUnique","objects":["Frontend","JavaScript"]}}' \
  https://{{host}}/1.1/classes/Post/<objectId>
Conditional Updates
Suppose we are going to deduct some money from an Account, and we want to make sure this deduction will not result in a negative balance.
We can use conditional updates by adding a where parameter with the condition balance >= amount:
curl -X PUT \
  -H "X-LC-Id: {{appid}}" \
  -H "X-LC-Key: {{appkey}}" \
  -H "Content-Type: application/json" \
  -d '{"balance":{"__op":"Decrement","amount": 30}}' \
  "https://{{host}}/1.1/classes/Account/558e20cbe4b060308e3eb36c?where=%7B%22balance%22%3A%7B%22%24gte%22%3A%2030%7D%7D"
Here %7B%22balance%22%3A%7B%22%24gte%22%3A%2030%7D%7D is the URL-encoded condition {"balance":{"$gte": 30}}.
If the condition is not met, the update will not be performed, and you will receive a 305 error:
{
  "code": 305,
  "error": "No effect on updating/deleting a document."
}
Note: where must be passed in as a query parameter of the URL.
A List of __op Operations
You can perform atomic operations with the __op("Method", {JSON parameters}) function.
| Operation | Description | Example |
|---|---|---|
| Delete | Delete a property of the object | __op('Delete', {'delete': true}) |
| Add | Add objects to the end of an array | __op('Add',{'objects':['Apple','Google']}) |
| AddUnique | Add each of the objects to the end of an array only if the object does not exist in the array | __op('AddUnique', {'objects':['Apple','Google']}) |
| Remove | Delete objects from the array | __op('Remove',{'objects':['Apple','Google']}) |
| AddRelation | Add a relation | __op('AddRelation', {'objects':[pointer('_User','558e20cbe4b060308e3eb36c')]}) |
| RemoveRelation | Remove a relation | __op('RemoveRelation', {'objects':[pointer('_User','558e20cbe4b060308e3eb36c')]}) |
| Increment | Increment | __op('Increment', {'amount': 50}) |
| Decrement | Decrement | __op('Decrement', {'amount': 50}) |
| BitAnd | Bitwise AND | __op('BitAnd', {'value': 0x0000000000000004}) |
| BitOr | Bitwise OR | __op('BitOr', {'value': 0x0000000000000004}) |
| BitXor | Bitwise XOR | __op('BitXor', {'value': 0x0000000000000004}) |
Deleting Objects
To delete an object, send a DELETE request to the URL for the object:
curl -X DELETE \
  -H "X-LC-Id: {{appid}}" \
  -H "X-LC-Key: {{appkey}}" \
  https://{{host}}/1.1/classes/Post/<objectId>
To delete an attribute from an object, send a PUT request with the Delete operator:
curl -X PUT \
  -H "X-LC-Id: {{appid}}" \
  -H "X-LC-Key: {{appkey}}" \
  -H "Content-Type: application/json" \
  -d '{"downvotes":{"__op":"Delete"}}' \
  https://{{host}}/1.1/classes/Post/<objectId>
Conditional Deletions
Similar to conditional updates, we pass a URL-encoded where parameter to the DELETE request to conditionally delete the object. For example, to delete a post if its clicks equals to 0:
curl -X DELETE \
  -H "X-LC-Id: {{appid}}" \
  -H "X-LC-Key: {{appkey}}" \
  -H "Content-Type: application/json" \
  "https://{{host}}/1.1/classes/Post/<objectId>?where=%7B%22clicks%22%3A%200%7D"
Here %7B%22clicks%22%3A%200%7D is the URL-encoded value for {"clicks": 0}.
Again, if the condition is not met, the update will not be performed, and you will receive a 305 error:
{
  "code": 305,
  "error": "No effect on updating/deleting a document."
}
Keep in mind that where must be a query parameter in the URL.
Iterating Over Objects
For classes with a moderate number of objects, we can iterate over all the objects in the class by constructing queries with skip, limit, and order.
However, for classes with a large number of objects, there will be a performance issue if we keep using skip.
To avoid this problem, we can do pagination by specifying the scope of createdAt or updatedAt.
There is a scan endpoint that is dedicated for this purpose: it can be used to iterate over the objects in a class ordered by a given field. Using scan makes things easier compared to constructing queries manually by specifying the scopes of createdAt or updatedAt.
By default, scan returns 100 results in ascending order by objectId. You can ask the cloud to return up to 1000 results by specifying the limit parameter:
curl -X GET \
   -H "X-LC-Id: {{appid}}" \
   -H "X-LC-Key: {{masterkey}},master" \
   -G \
   --data-urlencode 'limit=10' \
   https://{{host}}/1.1/scan/classes/Article
Be sure to use the MasterKey when using scan.
The cloud will return a results array and a cursor.
{
  "results": [
    {
      "tags": ["clojure", "\u7b97\u6cd5"],
      "createdAt": "2016-07-07T08:54:13.250Z",
      "updatedAt": "2016-07-07T08:54:50.268Z",
      "title": "clojure persistent vector",
      "objectId": "577e18b50a2b580057469a5e"
    }
    //...
  ],
  "cursor": "pQRhIrac3AEpLzCA"
}
The cursor will be null if there are no more results.
If cursor is not null, you can use scan again with the value of cursor to continue the iteration:
curl -X GET \
   -H "X-LC-Id: {{appid}}" \
   -H "X-LC-Key: {{masterkey}},master" \
   -G \
   --data-urlencode 'limit=10' \
   --data-urlencode 'cursor=pQRhIrac3AEpLzCA' \
   https://{{host}}/1.1/scan/classes/Article
Each cursor must be consumed within 10 minutes.
It becomes invalid after 10 minutes.
You can also specify where conditions for filtering:
curl -X GET \
   -H "X-LC-Id: {{appid}}" \
   -H "X-LC-Key: {{masterkey}},master" \
   -G \
   --data-urlencode 'limit=10' \
   --data-urlencode 'where={"score": 100}' \
   https://{{host}}/1.1/scan/classes/Article
As mentioned above, by default the results are in ascending order by objectId.
To return results ordered by another attribute,
pass that attribute as the scan_key parameter:
curl -X GET \
   -H "X-LC-Id: {{appid}}" \
   -H "X-LC-Key: {{masterkey}},master" \
   -G \
   --data-urlencode 'limit=10' \
   --data-urlencode 'scan_key=score' \
   https://{{host}}/1.1/scan/classes/Article
To return results in descending order, prefix a minus sign (-) to the value of the scan_key, e.g., -score.
The value of the scan_key passed must be strictly monotonous, and it cannot be used in where conditions.
You cannot set the include parameter when using scan.
If you wish to use include when iterating over the objects in a class, please use a basic query with setting the scopes of createdAt and updatedAt instead.
Batch Operations
To reduce the number of requests you make, you can wrap create, update, and delete operations on multiple objects in one request.
You can assign each operation its own method, path, and body, which replaces the HTTP requests you would ordinarily make. The operations will be executed according to the order they are sent to the server. For example, to make a series of posts at once:
curl -X POST \
  -H "X-LC-Id: {{appid}}" \
  -H "X-LC-Key: {{appkey}}" \
  -H "Content-Type: application/json" \
  -d '{
        "requests": [
          {
            "method": "POST",
            "path": "/1.1/classes/Post",
            "body": {
              "content": "Post 1",
              "pubUser": "TapTap"
            }
          },
          {
            "method": "POST",
            "path": "/1.1/classes/Post",
            "body": {
              "content": "Post 2",
              "pubUser": "TapTap"
            }
          }
        ]
      }' \
  https://{{host}}/1.1/batch
Currently, there is no limit on the number of operations in each request, but there is a 20 MB size limit on the request body for all API requests. It is recommended that you load at most 100 operations into each request.
The response body will be an array with the length and order of the members corresponding to those of the operations in the request.
Each member will be a JSON object with one and only one key, and that key will be either success or error.
The value of success or error will be the response to the corresponding single request on success or failure respectively.
[
  {
    "error": {
      "code": 1,
      "error": "Could not find object by id '558e20cbe4b060308e3eb36c' for class 'Post'."
    }
  },
  {
    "success": {
      "updatedAt": "2017-02-22T06:35:29.419Z",
      "objectId": "58ad2e850ce463006b217888"
    }
  }
]
Be aware that the HTTP status 200 returned by a batch request only means the cloud had received and performed the operations.
It does not mean that all the operations within the batch request succeeded.
Besides the POST requests in the above example,
you can also wrap PUT and DELETE requests in a batch request:
curl -X POST \
  -H "X-LC-Id: {{appid}}" \
  -H "X-LC-Key: {{appkey}}" \
  -H "Content-Type: application/json" \
  -d '{
        "requests": [
          {
            "method": "PUT",
            "path": "/1.1/classes/Post/55a39634e4b0ed48f0c1845b",
            "body": {
              "upvotes": 2
            }
          },
          {
            "method": "DELETE",
            "path": "/1.1/classes/Post/55a39634e4b0ed48f0c1845c"
          }
        ]
      }' \
  https://{{host}}/1.1/batch
Batch requests can also be used to replace requests with very long URLs (usually constructed with very complex queries or conditions) to bypass the limit on URL length enforced by the server side or the client side.
Advanced Data Types
Besides standard JSON values, we also support advanced data types like Date, Byte, and Pointer.
These advanced data types are encoded as a JSON object with a __type key.
Date contains an iso key, whose value is a UTC timestamp string in ISO 8601 format with millisecond precision: YYYY-MM-DDTHH:MM:SS.MMMZ.
{
  "__type": "Date",
  "iso": "2015-06-21T18:02:52.249Z"
}
The Date type can be useful when you perform queries on the built-in createdAt and updatedAt fields. For example, to query all the posts made on a specific time:
curl -X GET \
  -H "X-LC-Id: {{appid}}" \
  -H "X-LC-Key: {{appkey}}" \
  -H "Content-Type: application/json" \
  -G \
  --data-urlencode 'where={"createdAt":{"$gte":{"__type":"Date","iso":"2015-06-21T18:02:52.249Z"}}}' \
  https://{{host}}/1.1/classes/Post
Keep in mind that since createdAt and updatedAt are built-in fields, when their values are appearing in the response of a request, they will be in UTC timestamps rather than encoded Dates.
Byte contains a base64 key, whose value is a MIME base64 string (with no whitespace characters).
{
  "__type": "Bytes",
  "base64": "5b6I5aSa55So5oi36KGo56S65b6I5Zac5qyi5oiR5Lus55qE5paH5qGj6aOO5qC877yM5oiR5Lus5bey5bCGIExlYW5DbG91ZCDmiYDmnInmlofmoaPnmoQgTWFya2Rvd24g5qC85byP55qE5rqQ56CB5byA5pS+5Ye65p2l44CC"
}
Pointer contains a className key and an objectId key, whose values are the corresponding class name and objectId of the pointed value.
{
  "__type": "Pointer",
  "className": "Post",
  "objectId": "55a39634e4b0ed48f0c1845c"
}
A pointer to a user contains a className of _User.
The leading underscore indicates that _User is a built-in class.
Similarly, pointers to roles and installations contain a className of _Role or _Installation respectively.
However, a pointer to a file is a special case:
{
  "id": "543cbaede4b07db196f50f3c",
  "__type": "File"
}
GeoPoint contains latitude and longitude of the location:
{
  "__type": "GeoPoint",
  "latitude": 39.9,
  "longitude": 116.4
}
We may add more advanced data types in the future, so you should not use __type as the key of your own JSON objects.
Queries
Basic Queries
To list objects in a class, just send a GET request to the class URL. For example, to get all the posts:
curl -X GET \
  -H "X-LC-Id: {{appid}}" \
  -H "X-LC-Key: {{appkey}}" \
  -H "Content-Type: application/json" \
  https://{{host}}/1.1/classes/Post
The response body is a JSON object containing a results key,
whose value is an array of objects:
{
  "results": [
    {
      "content": "Post 1",
      "pubUser": "TapTap",
      "upvotes": 2,
      "createdAt": "2015-06-29T03:43:35.931Z",
      "objectId": "55a39634e4b0ed48f0c1845b"
    },
    {
      "content": "Post 2",
      "pubUser": "TapTap",
      "pubTimestamp": 1435541999,
      "createdAt": "2015-06-29T01:39:35.931Z",
      "updatedAt": "2015-06-29T01:39:35.931Z",
      "objectId": "558e20cbe4b060308e3eb36c"
    }
  ]
}
The values of createdAt and updatedAt you see on the dashboard are in the timezone of your local computer, and it is the same for the values obtained through our SDKs. However, when using the REST API, you will get those values in UTC. You can convert them to local times yourself if you need them.
Query Constraints
The where parameter can be used to apply query constraints.
It should be encoded as JSON first, then URL encoded.
The simplest form of where parameter is a key-value pair (exact match).
For example, to query posts published by TapTap:
curl -X GET \
  -H "X-LC-Id: {{appid}}" \
  -H "X-LC-Key: {{appkey}}" \
  -H "Content-Type: application/json" \
  -G \
  --data-urlencode 'where={"pubUser":"TapTap"}' \
  https://{{host}}/1.1/classes/Post
Other operators available for the where parameter:
| Operator | Description |
|---|---|
$ne | Not equal to |
$lt | Less than |
$lte | Less than or equal to |
$gt | Greater than |
$gte | Greater than or equal to |
$regex | Match a regular expression |
$in | Contain |
$nin | Not contain |
$all | Contain all (for array type) |
$exists | The given key exists |
$select | Match the result of another query |
$dontSelect | Not match the result of another query |
For example, to query all the posts published on 2015-06-29:
curl -X GET \
  -H "X-LC-Id: {{appid}}" \
  -H "X-LC-Key: {{appkey}}" \
  -H "Content-Type: application/json" \
  -G \
  --data-urlencode 'where={"createdAt":{"$gte":{"__type":"Date","iso":"2015-06-29T00:00:00.000Z"},"$lt":{"__type":"Date","iso":"2015-06-30T00:00:00.000Z"}}}' \
  https://{{host}}/1.1/classes/Post
To query all the posts whose number of votes is an odd number less than 10:
curl -X GET \
  -H "X-LC-Id: {{appid}}" \
  -H "X-LC-Key: {{appkey}}" \
  -H "Content-Type: application/json" \
  -G \
  --data-urlencode 'where={"upvotes":{"$in":[1,3,5,7,9]}}' \
  https://{{host}}/1.1/classes/Post
To query all the posts not published by TapTap:
curl -X GET \
  -H "X-LC-Id: {{appid}}" \
  -H "X-LC-Key: {{appkey}}" \
  -H "Content-Type: application/json" \
  -G \
  --data-urlencode 'where={"pubUser":{"$nin":["TapTap"]}}' \
  https://{{host}}/1.1/classes/Post
To query all the posts that have been voted by someone:
curl -X GET \
  -H "X-LC-Id: {{appid}}" \
  -H "X-LC-Key: {{appkey}}" \
  -H "Content-Type: application/json" \
  -G \
  --data-urlencode 'where={"upvotes":{"$exists":true}}' \
  https://{{host}}/1.1/classes/Post
To query all the posts that have not been voted:
curl -X GET \
  -H "X-LC-Id: {{appid}}" \
  -H "X-LC-Key: {{appkey}}" \
  -H "Content-Type: application/json" \
  -G \
  --data-urlencode 'where={"upvotes":{"$exists":false}}' \
  https://{{host}}/1.1/classes/Post
Suppose we use _Followee and _Follower classes for the following relationship, then we can query posts published by someone followed by the current user like this:
curl -X GET \
  -H "X-LC-Id: {{appid}}" \
  -H "X-LC-Key: {{appkey}}" \
  -H "Content-Type: application/json" \
  -G \
  --data-urlencode 'where={
    "author": {
      "$select": {
        "query": {
          "className":"_Followee",
           "where": {
             "user":{
               "__type": "Pointer",
               "className": "_User",
               "objectId": "55a39634e4b0ed48f0c1845c"
             }
           }
        },
        "key":"followee"
      }
    }
  }' \
  https://{{host}}/1.1/classes/Post
The order parameter can be used to specify how the returned objects shuold be sorted. For example, to query posts and sort them in ascending order by creation time:
curl -X GET \
  -H "X-LC-Id: {{appid}}" \
  -H "X-LC-Key: {{appkey}}" \
  -G \
  --data-urlencode 'order=createdAt' \
  https://{{host}}/1.1/classes/Post
To sort them in descending order:
curl -X GET \
  -H "X-LC-Id: {{appid}}" \
  -H "X-LC-Key: {{appkey}}" \
  -G \
  --data-urlencode 'order=-createdAt' \
  https://{{host}}/1.1/classes/Post
To sort results by multiple keys, use a comma to separate the keys. For example, to sort posts in ascending order by createdAt and descending order by pubUser:
curl -X GET \
  -H "X-LC-Id: {{appid}}" \
  -H "X-LC-Key: {{appkey}}" \
  -G \
  --data-urlencode 'order=createdAt,-pubUser' \
  https://{{host}}/1.1/classes/Post
You can implement paginiation with limit and skip. limit defaults to 100 but you can set it to any integer between 1 and 1000. If you give it a value out of this range, the default value (100) will be used. For example, to get the first 200 posts after the 400th:
curl -X GET \
  -H "X-LC-Id: {{appid}}" \
  -H "X-LC-Key: {{appkey}}" \
  -G \
  --data-urlencode 'limit=200' \
  --data-urlencode 'skip=400' \
  https://{{host}}/1.1/classes/Post
You can limit the fields being returned from the server by providing a keys parameter in your request. For example, to only include pubUser and content in the response (together with the built-in fields objectId, createdAt, and updatedAt):
curl -X GET \
  -H "X-LC-Id: {{appid}}" \
  -H "X-LC-Key: {{appkey}}" \
  -G \
  --data-urlencode 'keys=pubUser,content' \
  https://{{host}}/1.1/classes/Post
You can further limit the returned values to the properties of a given field. For example, to only get the family names of the authors, you can write keys=pubUser.familyName.
You can also specify which fields you want to exclude from the response by adding a minus sign before the field names. For example, to exclude the author field:
curl -X GET \
  -H "X-LC-Id: {{appid}}" \
  -H "X-LC-Key: {{appkey}}" \
  -G \
  --data-urlencode 'keys=-author' \
  https://{{host}}/1.1/classes/Post
The inverted selection applies to preserved attributes as well. For example, you can write keys=-createdAt,-updatedAt,-objectId.
You can also use it with dot notation, e.g., keys=-pubUser.createdAt,-pubUser.updatedAt.
Including ACL in the Response
By default, the response will not contain the ACL field.
The ACL field will only be included if you enabled Include ACL with objects being queried under Developer Center > Your Game > Game Services > Cloud Services > Data Storage > Settings > Queries and you included returnACL=true in the request.
All the parameters mentioned above can be combined.
Regex Queries
To query posts whose title begins with WTO:
curl -X GET \
  -H "X-LC-Id: {{appid}}" \
  -H "X-LC-Key: {{appkey}}" \
  -H "Content-Type: application/json" \
  -G \
  --data-urlencode 'where={"title":{"$regex":"^WTO.*","$options":"i"}}' \
  https://{{host}}/1.1/classes/Post
We will use the following dataset to demonstrate how you can use $options to match different values of title:
{ "_id" : 100, "title" : "Single line description." },
{ "_id" : 101, "title" : "First line\nSecond line" },
{ "_id" : 102, "title" : "Many spaces before     line" },
{ "_id" : 103, "title" : "Multiple\nline description" },
{ "_id" : 104, "title" : "abc123" }
| Option | Description | Example |
|---|---|---|
i | Case-insensitive search | {"$regex":"single", "$options":"i"} will match |
m | Multi-line search Can be used for strings containing \n | {"$regex":"^S", "$options":"m"} (starts with capital “S”) will match |
x | Free-spacing and line comments Includes spaces, tabs, \n, and comments starting with #,but does not include vertical tabs (ASCII: 11). | {"$regex":"abc #category code\n123 #item number", "$options":"x"} (comments after #) will match |
s | Allow . to match newline characters | {"$regex":"m.*line", "$options":"si"} will match |
The options above can be combined, for example "$options":"sixm".
Array Queries
With key being an array field, to query all the objects with key containing 2:
curl -X GET \
  -H "X-LC-Id: {{appid}}" \
  -H "X-LC-Key: {{appkey}}" \
  -G \
  --data-urlencode 'where={"arrayKey":2}' \
  https://{{host}}/1.1/classes/TestObject
To query all the objects with key containing 2, 3, or 4:
curl -X GET \
  -H "X-LC-Id: {{appid}}" \
  -H "X-LC-Key: {{appkey}}" \
  -G \
  --data-urlencode 'where={"arrayKey":{"$in":[2,3,4]}}' \
  https://{{host}}/1.1/classes/TestObject
Using $all to query all the objects with key containing 2, 3, and 4:
curl -X GET \
  -H "X-LC-Id: {{appid}}" \
  -H "X-LC-Key: {{appkey}}" \
  -G \
  --data-urlencode 'where={"arrayKey":{"$all":[2,3,4]}}' \
  https://{{host}}/1.1/classes/TestObject
Using $size to query all the objects with key containing exactly 3 objects:
curl -X GET \
  -H "X-LC-Id: {{appid}}" \
  -H "X-LC-Key: {{appkey}}" \
  -G \
  --data-urlencode 'where={"arrayKey":{"$size": 3}}' \
  https://{{host}}/1.1/classes/TestObject
Pointer Queries
There are a couple of ways you can use to query relations between objects. If you want to query objects that have a field pointing to a specific object, you can construct a Pointer and pass it to the where parameter. Assuming there is a Comment class with a post field pointing to the Post class, you can query all the comments under a post with this command:
curl -X GET \
  -H "X-LC-Id: {{appid}}" \
  -H "X-LC-Key: {{appkey}}" \
  -G \
  --data-urlencode 'where={"post":{"__type":"Pointer","className":"Post","objectId":"558e20cbe4b060308e3eb36c"}}' \
  https://{{host}}/1.1/classes/Comment
To query objects with pointers according to another query on the pointed object, you can use the $inQuery operator. Keep in mind that the default value of limit is 100 and the maximum value of it is 1000, and this restriction applies to inner queries as well. You may need to carefully construct queries to get your expected result.
For example, assuming each post has an image field, to query all the comments on posts with attached images:
curl -X GET \
  -H "X-LC-Id: {{appid}}" \
  -H "X-LC-Key: {{appkey}}" \
  -G \
  --data-urlencode 'where={"post":{"$inQuery":{"where":{"image":{"$exists":true}},"className":"Post"}}}' \
  https://{{host}}/1.1/classes/Comment
To include pointed objects in one query, use the include parameter.
For example, to query the most recent 10 comments with the posts commented on:
curl -X GET \
  -H "X-LC-Id: {{appid}}" \
  -H "X-LC-Key: {{appkey}}" \
  -G \
  --data-urlencode 'order=-createdAt' \
  --data-urlencode 'limit=10' \
  --data-urlencode 'include=post' \
  https://{{host}}/1.1/classes/Comment
Without the include parameter, the post attribute of the returned comments will look like this:
{
  "__type": "Pointer",
  "className": "Post",
  "objectId": "51e3a359e4b015ead4d95ddc"
}
With the include=post parameter, the post attribute will be dereferenced:
{
  "__type": "Object",
  "className": "Post",
  "objectId": "51e3a359e4b015ead4d95ddc",
  "createdAt": "2015-06-29T09:31:20.371Z",
  "updatedAt": "2015-06-29T09:31:20.371Z",
  "desc": "this is a post"
}
You can use dots (.) for multi-level dereference. For example, to get the authors of the posts pointed by comments:
curl -X GET \
  -H "X-LC-Id: {{appid}}" \
  -H "X-LC-Key: {{appkey}}" \
  -G \
  --data-urlencode 'order=-createdAt' \
  --data-urlencode 'limit=10' \
  --data-urlencode 'include=post.author' \
  https://{{host}}/1.1/classes/Comment
And you can use comma (,) to separate multiple pointers to include.
GeoPoint Queries
Early on we have briefly described GeoPoint.
Assuming we are including the location information of each post in the location field, you can use the $nearSphere operator to query nearby objects. For example, to retrieve 10 posts whose locations are the closest to the current location:
curl -X GET \
  -H "X-LC-Id: {{appid}}" \
  -H "X-LC-Key: {{appkey}}" \
  -G \
  --data-urlencode 'limit=10' \
  --data-urlencode 'where={
        "location": {
          "$nearSphere": {
            "__type": "GeoPoint",
            "latitude": 39.9,
            "longitude": 116.4
          }
        }
      }' \
  https://{{host}}/1.1/classes/Post
The returned results will be ordered by distance, with the first result being the post published at the nearest location.
This order can be overridden by the order parameter.
To limit the maximum distance, you can use $maxDistanceInMiles, $maxDistanceInKilometers, or $maxDistanceInRadians. For example, to limit the distance to 10 miles:
curl -X GET \
  -H "X-LC-Id: {{appid}}" \
  -H "X-LC-Key: {{appkey}}" \
  -G \
  --data-urlencode 'where={
        "location": {
          "$nearSphere": {
            "__type": "GeoPoint",
            "latitude": 39.9,
            "longitude": 116.4
          },
          "$maxDistanceInMiles": 10.0
        }
      }' \
  https://{{host}}/1.1/classes/Post
You can also query for objects within a rectangular area with this format: {"$within": {"$box": [southwestGeoPoint, northeastGeoPoint]}}.
curl -X GET \
  -H "X-LC-Id: {{appid}}" \
  -H "X-LC-Key: {{appkey}}" \
  -G \
  --data-urlencode 'where={
        "location": {
          "$within": {
            "$box": [
              {
                "__type": "GeoPoint",
                "latitude": 39.97,
                "longitude": 116.33
              },
              {
                "__type": "GeoPoint",
                "latitude": 39.99,
                "longitude": 116.37
              }
            ]
          }
        }
      }' \
  https://{{host}}/1.1/classes/Post
Be aware that the range of latitude is [-90.0, 90.0], and the range of longitude is [-180.0, 180.0].
There is currently one limit on GeoPoints: every class can only contain one GeoPoint attribute.
File Queries
Querying files is similar to querying normal objects. For example, to query all files (just like querying normal objects, it returns at most 100 results by default):
curl -X GET \
  -H "X-LC-Id: {{appid}}" \
  -H "X-LC-Key: {{appkey}}" \
  -H "Content-Type: application/json" \
  https://{{host}}/1.1/classes/files
Be aware that the urls of the internal files (those uploaded to the cloud) are automatically generated by the cloud and are applied with the logic related to updating custom domains.
This means that you should only query external files (those saved with URLs) with the url field. For internal files, please query with the key field (the path in the URL) instead.
For the same reason, when iterating over files with scan, the internal files in the result will not have the url field but only the key field.
Counting Results
You can pass count=1 parameter to retrieve the count of matched results.
For example, if you just need to know how many posts a specific user has made:
curl -X GET \
  -H "X-LC-Id: {{appid}}" \
  -H "X-LC-Key: {{appkey}}" \
  -G \
  --data-urlencode 'where={"pubUser":"TapTap"}' \
  --data-urlencode 'count=1' \
  --data-urlencode 'limit=0' \
  https://{{host}}/1.1/classes/Post
Since limit=0, only the count will be returned, and the results array will be empty.
{
  "results": [],
  "count": 7
}
Given a nonzero limit parameter, results will be returned together with the count.
Compound Queries
You can use the $or operator to query objects matching any one of the several queries. For example, to query posts made by official accounts and personal accounts:
curl -X GET \
  -H "X-LC-Id: {{appid}}" \
  -H "X-LC-Key: {{appkey}}" \
  -G \
  --data-urlencode 'where={"$or":[{"pubUserCertificate":{"$gt":2}},{"pubUserCertificate":{"$lt":3}}]}' \
  https://{{host}}/1.1/classes/Post
Similarly, you can use $and operator to query objects matching all subqueries. For example, to query all the objects that have the price field and with price not equaling to 199:
where={"$and":[{"price": {"$ne":199}},{"price":{"$exists":true}}]}
The query condition expressions are implicitly combined with the $and operator, so the query expression above could also be rewritten as:
where=[{"price": {"$ne":199}},{"price":{"$exists":true}}]
In fact, since both conditions are targeted at the same field (price), the above query expression can be further simplified to:
where={"price": {"$ne":199, "$exists":true}}
However, to combine two or more OR-ed queries, you have to use the $and operator:
where={"$and":[{"$or":[{"pubUserCertificate":{"$gt":2}},{"pubUserCertificate":{"$lt":3}}]},{"$or":[{"pubUser":"TapTap"},{"pubUser":"TDS"}]}]}
Be aware that non-filtering constraints such as limit, skip, order, and include are not allowed in subqueries of a compound query.
Users
With the users API, you can build an account system for your application quickly and conveniently.
Users (the _User class) share many traits with other classes. For example, _User is schema-free as well.
However, all user objects must have username and password attributes. password will be encrypted automatically.
username and email (if available) attributes must be unique (case sensitive).
Signing Up
To create a new user:
curl -X POST \
  -H "X-LC-Id: {{appid}}" \
  -H "X-LC-Key: {{appkey}}" \
  -H "Content-Type: application/json" \
  -d '{"username":"tom","password":"f32@ds*@&dsa","phone":"18612340000"}' \
  https://{{host}}/1.1/users
As mentioned above, username and password are required. password will be stored in encrypted form, and the cloud will never return its value to the client side.
If the registration succeeds, the cloud will return 201 Created and the Location will contain the URL for that user:
Status: 201 Created
Location: https://{{host}}/1.1/users/55a47496e4b05001a7732c5f
The response body is a JSON object containing three attributes:
{
  "sessionToken": "qmdj8pdidnmyzp0c7yqil91oc",
  "createdAt": "2015-07-14T02:31:50.100Z",
  "objectId": "55a47496e4b05001a7732c5f"
}
Logging In
To log in with username and password:
curl -X POST \
-H "Content-Type: application/json" \
-H "X-LC-Id: {{appid}}" \
-H "X-LC-Key: {{appkey}}" \
-d '{"username":"tom","password":"f32@ds*@&dsa"}' \
https://{{host}}/1.1/login
You can also log in with email and password by replacing the body with:
{ "email": "tom@example.com", "password": "f32@ds*@&dsa" }
Or, log in with phone number and password:
{ "mobilePhoneNumber": "+86186xxxxxxxx", "password": "f32@ds*@&dsa" }
The response body is a JSON object containing all the attributes of that user, except password:
{
  "sessionToken": "qmdj8pdidnmyzp0c7yqil91oc",
  "updatedAt": "2015-07-14T02:31:50.100Z",
  "phone": "18612340000",
  "objectId": "55a47496e4b05001a7732c5f",
  "username": "tom",
  "createdAt": "2015-07-14T02:31:50.100Z",
  "emailVerified": false,
  "mobilePhoneVerified": false
}
Refresh sessionToken
To refresh a user's sessionToken:
curl -X PUT \
  -H "X-LC-Id: {{appid}}" \
  -H "X-LC-Key: {{appkey}}" \
  -H "X-LC-Session: qmdj8pdidnmyzp0c7yqil91oc" \
  https://{{host}}/1.1/users/57e3bcca67f35600577c3063/refreshSessionToken
X-LC-Session can be omitted when using Master Key.
If succeeded, a new sessionToken will be returned, with user information:
{
  "sessionToken": "5frlikqlwzx1nh3wzsdtfr4q7",
  "updatedAt": "2016-10-20T03:10:57.926Z",
  "objectId": "57e3bcca67f35600577c3063",
  "username": "tom",
  "createdAt": "2016-09-22T11:13:14.842Z",
  "emailVerified": false,
  "mobilePhoneVerified": false
}
Locking Users
Seven consecutive failed login attempts for a user within 15 minutes will trigger a lock. Once this happens, the cloud will return the following error:
{
  "code": 219,
  "error": "Tried too many times to signin."
}
The cloud will release this lock automatically in 15 minutes after the last login failure. You cannot adjust this behavior via SDK or REST API. During the locking period, the user is not allowed to log in, even if they provide the correct password. This restriction also applies to SDK and Cloud Engine.
Verifying Email Address
Once a user clicked the verification link in the email, their emailVerified will be set to true.
emailVerified is a Boolean with 3 statuses:
true: the user has verified their email address via clicking the link in the verification mail.false: when a user'semailattribute is set or modified, the cloud will set theiremailVerifiedtofalseand send a verification email to the user. After the user clicks the verification link in the email, the cloud will setemailVerifiedtotrue.null: The user does not have anemail, or the user object is created when the verifying new user's email address option is disabled.
The verification link expires in one week. To resend the verification email:
curl -X POST \
  -H "X-LC-Id: {{appid}}" \
  -H "X-LC-Key: {{appkey}}" \
  -H "Content-Type: application/json" \
  -d '{"email":"tom@example.com"}' \
  https://{{host}}/1.1/requestEmailVerify
Resetting Password
A user can reset their password via email:
curl -X POST \
  -H "X-LC-Id: {{appid}}" \
  -H "X-LC-Key: {{appkey}}" \
  -H "Content-Type: application/json" \
  -d '{"email":"tom@example.com"}' \
  https://{{host}}/1.1/requestPasswordReset
If succeed, the response body will be an empty JSON object:
{}
Retrieving Users
To retrieve a user, you can send a GET request to the user URL (as in the Location header returned on successful signing up).
curl -X GET \
  -H "X-LC-Id: {{appid}}" \
  -H "X-LC-Key: {{appkey}}" \
  https://{{host}}/1.1/users/55a47496e4b05001a7732c5f
Alternatively, you can retrieve a user via their sessionToken:
curl -X GET \
  -H "X-LC-Id: {{appid}}" \
  -H "X-LC-Key: {{appkey}}" \
  -H "X-LC-Session: qmdj8pdidnmyzp0c7yqil91oc" \
  https://{{host}}/1.1/users/me
The returned JSON object is the same as in /login.
If the user does not exist, a 400 Bad Request will be returned:
{
  "code": 211,
  "error": "Could not find user."
}
Updating Users
Similar to Updating Objects, you can send a PUT request to the user URL to update a user's data.
curl -X PUT \
  -H "X-LC-Id: {{appid}}" \
  -H "X-LC-Key: {{appkey}}" \
  -H "X-LC-Session: qmdj8pdidnmyzp0c7yqil91oc" \
  -H "Content-Type: application/json" \
  -d '{"phone":"18600001234"}' \
  https://{{host}}/1.1/users/55a47496e4b05001a7732c5f
The X-LC-Session HTTP header is to authenticate the modification,
whose value is the user's sessionToken.
If succeed, updatedAt will be returned.
This is the same as Updating Objects.
If you want to update username, then you have to ensure that the new value of username must not conflict with other existing users.
If you want to update password after verifying the old password,
you can use PUT /1.1/users/:objectId/updatePassword instead.
curl -X PUT \
  -H "X-LC-Id: {{appid}}" \
  -H "X-LC-Key: {{appkey}}" \
  -H "X-LC-Session: qmdj8pdidnmyzp0c7yqil91oc" \
  -H "Content-Type: application/json" \
  -d '{"old_password":"the_old_password", "new_password":"the_new_password"}' \
  https://{{host}}/1.1/users/55a47496e4b05001a7732c5f/updatePassword
Note that this API still requires the X-LC-Session header.
Querying Users
You can query users like how you query regular objects by sending GET requests to /1.1/users.
However, for security concerns, all queries on users will be rejected by the cloud unless you use the master key or have properly configured the _User class' ACL settings.
Deleting Users
Just like deleting an object, you can send a DELETE request to delete a user.
curl -X DELETE \
  -H "X-LC-Id: {{appid}}" \
  -H "X-LC-Key: {{appkey}}" \
  -H "X-LC-Session: qmdj8pdidnmyzp0c7yqil91oc" \
  https://{{host}}/1.1/users/55a47496e4b05001a7732c5f
The X-LC-Session HTTP header is used for authenticating this request.
Linking Users
To allow users to use third-party accounts to log in to your application, you can use the authData attribute of users.
authData is a JSON object whose schema may be different for different services.
The simplest form of authData is as follows:
{
  "anonymous": {
    "id": "random UUID with lowercase hexadecimal digits"
    // other optional keys
  }
}
This is used for anonymous users, for example, to provide a "try it before signing up" or "guest login" feature for your application.
The authData for an arbitrary platform:
{
  "platform_name": {
    "uid": "unique user id on that platform (string)",
    "access_token": "access token for the user"
    // other optional keys
  }
}
authData can have other additional keys, but it must contain both uid and access_token.
The cloud will automatically create a unique index for authData.platform_name.uid.
This avoids binding a third-party account to multiple users.
However, you need to verify authData yourself (except for certain platforms, see below).
Example authData objects:
{
  "authData": {
    "lc_apple": {
      "uid": "user identifier",
      "identity_token": "identity token",
      "code": "authorization code"
    }
  }
}
{
  "taptap": {
    "kid": "mac_key id",
    "access_token": "Same as kid",
    "token_type": "mac",
    "mac_key": "mac key",
    "mac_algorithm": "hmac-sha-1",
    "openid": "The unique identifier of the user; a user has different openid's for different apps",
    "name": "username",
    "avatar": "URL of the user's avatar",
    "unionid": "The unique identifier of the user; a user has the same unionid for all the apps under the same developer"
  }
}
Other platforms:
{
  "platform name, like facebook": {
    "uid": "A unique identifier of the user from the platform",
    "access_token": "Access Token"
    // ……optional properties
  }
}
Third-Party Signing Up and Login
To sign up or log in via a third party account, you also send a POST request with the authData.
For example, to log in with Apple:
curl -X POST \
  -H "X-LC-Id: {{appid}}" \
  -H "X-LC-Key: {{appkey}}" \
  -H "Content-Type: application/json" \
  -d '{
     "authData": {
       "lc_apple": {
          "uid": "user identifier",
          "identity_token": "identity token",
          "code": "authorization code"
         }
    }
    }' \
  https://{{host}}/1.1/users
The response body will be a JSON object whose content is similar to the one returned when creating or logging in as a regular user.
A new user will be automatically assigned with a random username, e.g., ec9m07bo32cko6soqtvn6bko5.
Linking a Third-Party Account
To link a third-party account to an existing user,
just update this user's authData attribute.
curl -X PUT \
  -H "X-LC-Id: {{appid}}" \
  -H "X-LC-Key: {{appkey}}" \
  -H "X-LC-Session: qmdj8pdidnmyzp0c7yqil91oc" \
  -H "Content-Type: application/json" \
  -d '{
       "lc_apple": {
          "uid": "user identifier",
          "identity_token": "identity token",
          "code": "authorization code"
         }
      }' \
  https://{{host}}/1.1/users/55a47496e4b05001a7732c5f
This user can be authenticated via matching authData afterward.
Unlinking a Third-Party Account
Similarly, to unlink a user from a third party account,
just delete the platform in their authData attribute.
curl -X PUT \
  -H "X-LC-Id: {{appid}}" \
  -H "X-LC-Key: {{appkey}}" \
  -H "X-LC-Session: 6fehqhr2t2na5mv1aq2om7jgz" \
  -H "Content-Type: application/json" \
  -d '{"authData.lc_apple":{"__op":"Delete"}}' \
  https://{{host}}/1.1/users/5b7e53a767f356005fb374f6
Roles
The Data Storage service has a preserved class _Role for roles.
For security concerns, roles are typically created and managed manually or via a separate management interface, not directly in your app.
Creating Roles
Creating a role is similar to creating an object, except that you must specify the name and ACL attributes. To prevent allowing wrong users to modify a role accidentally, you should set a restrictive and rigid ACL.
curl -X POST \
  -H "X-LC-Id: {{appid}}" \
  -H "X-LC-Key: {{appkey}}" \
  -H "Content-Type: application/json" \
  -d '{
        "name": "Manager",
        "ACL": {
          "*": {
            "read": true
          }
        }
      }' \
  https://{{host}}/1.1/roles
The response is the same as creating an object.
To create a role with existing child roles and users:
curl -X POST \
  -H "X-LC-Id: {{appid}}" \
  -H "X-LC-Key: {{appkey}}" \
  -H "Content-Type: application/json" \
  -d '{
        "name": "CLevel",
        "ACL": {
          "*": {
            "read": true
          }
        },
        "roles": {
          "__op": "AddRelation",
          "objects": [
            {
              "__type": "Pointer",
              "className": "_Role",
              "objectId": "55a48351e4b05001a774a89f"
            }
          ]
        },
        "users": {
          "__op": "AddRelation",
          "objects": [
            {
              "__type": "Pointer",
              "className": "_User",
              "objectId": "55a47496e4b05001a7732c5f"
            }
          ]
        }
      }' \
  https://{{host}}/1.1/roles
You may have noticed that there is a new operator AddRelation we have not seen before.
This operator adds a Relation to an object.
The actual implementation of Relation is quite complicated for performance issues,
but conceptually you can consider a Relation as an array of pointers, and they are only used in roles.
Retrieving Roles
Retrieving a role is similar to retrieving an object:
curl -X GET \
  -H "X-LC-Id: {{appid}}" \
  -H "X-LC-Key: {{appkey}}" \
  https://{{host}}/1.1/roles/55a483f0e4b05001a774b837
The response body will be a JSON object:
{
  "name": "CLevel",
  "createdAt": "2015-07-14T03:37:20.992Z",
  "updatedAt": "2015-07-14T03:37:20.994Z",
  "objectId": "55a483f0e4b05001a774b837",
  "users": {
    "__type": "Relation",
    "className": "_User"
  },
  "roles": {
    "__type": "Relation",
    "className": "_Role"
  }
}
Updating Roles
Updating roles are similar to updating objects, except that name cannot be modified, as mentioned above.
To add or remove users and child roles, you can use AddRelation and RemoveRelation operators.
Suppose we have a Manager role with objectId 55a48351e4b05001a774a89f, we can add a user to it as below:
curl -X PUT \
  -H "X-LC-Id: {{appid}}" \
  -H "X-LC-Key: {{appkey}}" \
  -H "Content-Type: application/json" \
  -d '{
        "users": {
          "__op": "AddRelation",
          "objects": [
            {
              "__type": "Pointer",
              "className": "_User",
              "objectId": "55a4800fe4b05001a7745c41"
            }
          ]
        }
      }' \
  https://{{host}}/1.1/roles/55a48351e4b05001a774a89f
Similarly, to remove a child role:
curl -X PUT \
  -H "X-LC-Id: {{appid}}" \
  -H "X-LC-Key: {{appkey}}" \
  -H "Content-Type: application/json" \
  -d '{
        "roles": {
          "__op": "RemoveRelation",
          "objects": [
            {
              "__type": "Pointer",
              "className": "_Role",
              "objectId": "55a483f0e4b05001a774b837"
            }
          ]
        }
      }' \
  https://{{host}}/1.1/roles/55a48351e4b05001a774a89f
Querying Roles
To find the roles a user belongs to:
curl -X GET \
  -H "X-LC-Id: {{appid}}" \
  -H "X-LC-Key: {{appkey}}" \
  -G \
  --data-urlencode 'where={"users": {"__type": "Pointer", "className": "_User", "objectId": "5e03100ed4b56c008e4a91dc"}}' \
  https://{{host}}/1.1/roles
To find the users contained in a role (users contained in sub-roles not counted):
curl -X GET \
  -H "X-LC-Id: {{appid}}" \
  -H "X-LC-Key: {{appkey}}" \
  -G \
  --data-urlencode '"$relatedTo":{"object":{"__type":"Pointer","className":"_Role","objectId":"5f3dea7b7a53400006b13886"},"key":"users"}' \
  https://{{host}}/1.1/users
You can also query roles based on other attributes, just like querying a normal object.
Deleting Roles
Deleting roles is similar to delete objects.
It is authenticated with the X-LC-Session HTTP header.
The session token passed in must belong to a user who has the permission to delete the specified role.
curl -X DELETE \
  -H "X-LC-Id: {{appid}}" \
  -H "X-LC-Key: {{appkey}}" \
  -H "X-LC-Session: qmdj8pdidnmyzp0c7yqil91oc" \
  https://{{host}}/1.1/roles/55a483f0e4b05001a774b837
Roles and ACL
As demonstrated above, accessing data via REST API is also restricted by ACL, just as SDKs.
Roles make maintaining ACL easier. For example, to set an ACL of an object with the following permissions:
- It can be read by
Staffs. - It can only be written by
Managers and its creator.
{
  "55a4800fe4b05001a7745c41": {
    "write": true
  },
  "role:Staff": {
    "read": true
  },
  "role:Manager": {
    "write": true
  }
}
The creator belongs to the Staff role, and the Manager role is a child role of the Staff role.
Therefore, since they will inherit read permissions, we did not grant them the read permission manually.
Let's look at another example of permission inherence among roles.
In UGC applications such as forums, Administrators typically have all the permissions of Moderators.
Thus Administrators should be a sub-role of Moderators.
curl -X PUT \
  -H "X-LC-Id: {{appid}}" \
  -H "X-LC-Key: {{appkey}}" \
  -H "Content-Type: application/json" \
  -d '{
        "roles": {
          "__op": "AddRelation",
          "objects": [
            {
              "__type": "Pointer",
              "className": "_Role",
              "objectId": "<AdministratorsRoleObjectId>"
            }
          ]
        }
      }' \
  https://{{host}}/1.1/roles/<ModeratorsRoleObjectId>
Files
Creating Files
The REST API does not support uploading files. Please use an SDK or the CLI to upload files.
If you already have a URL for a file, you can create a file by adding an entry like this:
curl -X POST \
  -H "X-LC-Id: {{appid}}" \
  -H "X-LC-Key: {{appkey}}" \
  -H "Content-Type: application/json" \
  -d '{"url": "https://example.com/foo.jpg", "name": "foo.jpg", "mime_type": "image/jpeg"}' \
  https://{{host}}/1.1/files
Associating With Objects
As mentioned above, files can be considered as a special form of pointers.
To associate a file object with an object, we just pass the file object {"id": "objectId of the file", "__type": "File"} to an attribute of that file.
For example, to create a Staff object with a photo:
curl -X POST \
  -H "X-LC-Id: {{appid}}" \
  -H "X-LC-Key: {{appkey}}" \
   -H "Content-Type: application/json" \
  -d '{
        "name": "tom",
        "picture": {
          "id": "543cbaede4b07db196f50f3c",
          "__type": "File"
        }
      }' \
  https://{{host}}/1.1/classes/Staff
Here id is the objectId of the file.
Deleting Files
Deleting files is similar to deleting objects:
curl -X DELETE \
  -H "X-LC-Id: {{appid}}" \
  -H "X-LC-Key: {{appkey}}" \
  https://{{host}}/1.1/files/543cbaede4b07db196f50f3c
Schema
You can use REST API to fetch the data schema of your application. For security concerns, the master key is required to fetch data schema.
To fetch the schema of all classes:
curl -X GET \
   -H "X-LC-Id: {{appid}}" \
   -H "X-LC-Key: {{masterkey}},master" \
   https://{{host}}/1.1/schemas
Result:
{
  "_User": {
    "username": { "type": "String" },
    "password": { "type": "String" },
    "objectId": { "type": "String" },
    "emailVerified": { "type": "Boolean" },
    "email": { "type": "String" },
    "createdAt": { "type": "Date" },
    "updatedAt": { "type": "Date" },
    "authData": { "type": "Object" }
  }
  // other classes
}
You can also fetch a single class's schema:
curl -X GET \
   -H "X-LC-Id: {{appid}}" \
   -H "X-LC-Key: {{masterkey}},master" \
   https://{{host}}/1.1/schemas/_User
Data schema can be used with tools such as code generators and internal management interfaces.
Exporting Your Data
For security concerns, master key is required to export your data:
curl -X POST \
  -H "X-LC-Id: {{appid}}" \
  -H "X-LC-Key: {{masterkey}},master" \
  -H "Content-Type: application/json" \
  -d '{}' \
  https://{{host}}/1.1/exportData
To specify date range (updatedAt) of data to export:
curl -X POST \
  -H "X-LC-Id: {{appid}}" \
  -H "X-LC-Key: {{masterkey}},master" \
  -H "Content-Type: application/json" \
  -d '{"from_date":"2015-09-20", "to_date":"2015-09-25"}' \
  https://{{host}}/1.1/exportData
To specify classes of data to export:
curl -X POST \
  -H "X-LC-Id: {{appid}}" \
  -H "X-LC-Key: {{masterkey}},master" \
  -H "Content-Type: application/json" \
  -d '{"classes":"_User,GameScore,Post"}' \
  https://{{host}}/1.1/exportData
Just export the schema (no data will be exported):
curl -X POST \
  -H "X-LC-Id: {{appid}}" \
  -H "X-LC-Key: {{masterkey}},master" \
  -H "Content-Type: application/json" \
  -d '{"only-schema":"true"}' \
  https://{{host}}/1.1/exportData
The exported schema file can be imported into other applications via the import data function on the dashboard.
After the data is exported, we will send an email to the application creator, containing the URL to download the data. You can also specify the address to receive this email:
curl -X POST \
  -H "X-LC-Id: {{appid}}" \
  -H "X-LC-Key: {{masterkey}},master" \
  -H "Content-Type: application/json" \
  -d '{"email":"username@exmaple.com"}' \
  https://{{host}}/1.1/exportData
The export data job id will be returned:
{
  "status": "running",
  "id": "1wugzx81LvS5R4RHsuaeMPKlJqFMFyLwYDNcx6LvCc6MEzQ2",
  "app_id": "{{appid}}"
}
You can also query the export data job status via the id returned previously:
curl -X GET \
  -H "X-LC-Id: {{appid}}" \
  -H "X-LC-Key: {{masterkey}},master" \
  https://{{host}}/1.1/exportData/1wugzx81LvS5R4RHsuaeMPKlJqFMFyLwYDNcx6LvCc6MEzQ2
If the job status is done, the download url will also be returned:
{
  "status": "done",
  "download_url": "https://download.leancloud.cn/export/example.tar.gz",
  "id": "1wugzx81LvS5R4RHsuaeMPKlJqFMFyLwYDNcx6LvCc6MEzQ2",
  "app_id": "{{appid}}"
}
If the job status is still running, you can query it again later.
Other
Server Time
To retrieve the server's current time:
curl -i -X GET \
    -H "X-LC-Id: {{appid}}" \
    -H "X-LC-Key: {{appkey}}" \
    https://{{host}}/1.1/date
The returned date is in UTC:
{
  "iso": "2015-08-27T07:38:33.643Z",
  "__type": "Date"
}
CORS Workarounds
You can wrap GET, PUT, and DELETE requests in a POST request:
- Specify the intended HTTP method in the
_methodparameter. - Specify
appidandappkeyin_ApplicationIdand_ApplicationKeyparameters.
This is a workaround that only works for certain platforms. It is recommended to follow the HTML CORS standard instead.
GET
  curl -i -X POST \
  -H "Content-Type: text/plain" \
  -d \
  '{"_method":"GET",
    "_ApplicationId":"{{appid}}",
    "_ApplicationKey":"{{appkey}}"}' \
  https://{{host}}/1.1/classes/Post/<objectId>
PUT
curl -i -X POST \
  -H "Content-Type: text/plain" \
  -d \
  '{"_method":"PUT",
    "_ApplicationId":"{{appid}}",
    "_ApplicationKey":"{{appkey}}",
    "upvotes":99}' \
  https://{{host}}/1.1/classes/Post/<objectId>
DELETE
curl -i -X POST \
  -H "Content-Type: text/plain" \
  -d \
  '{"_method":  "DELETE",
    "_ApplicationId":"{{appid}}",
    "_ApplicationKey":"{{appkey}}"}' \
  https://{{host}}/1.1/classes/Post/<objectId>